How To Create A Project Using eJoist
Your content goes here. Edit or remove this text inline or in the module Content settings. You can also style every aspect of this content in the module Design settings and even apply custom CSS to this text in the module Advanced settings.
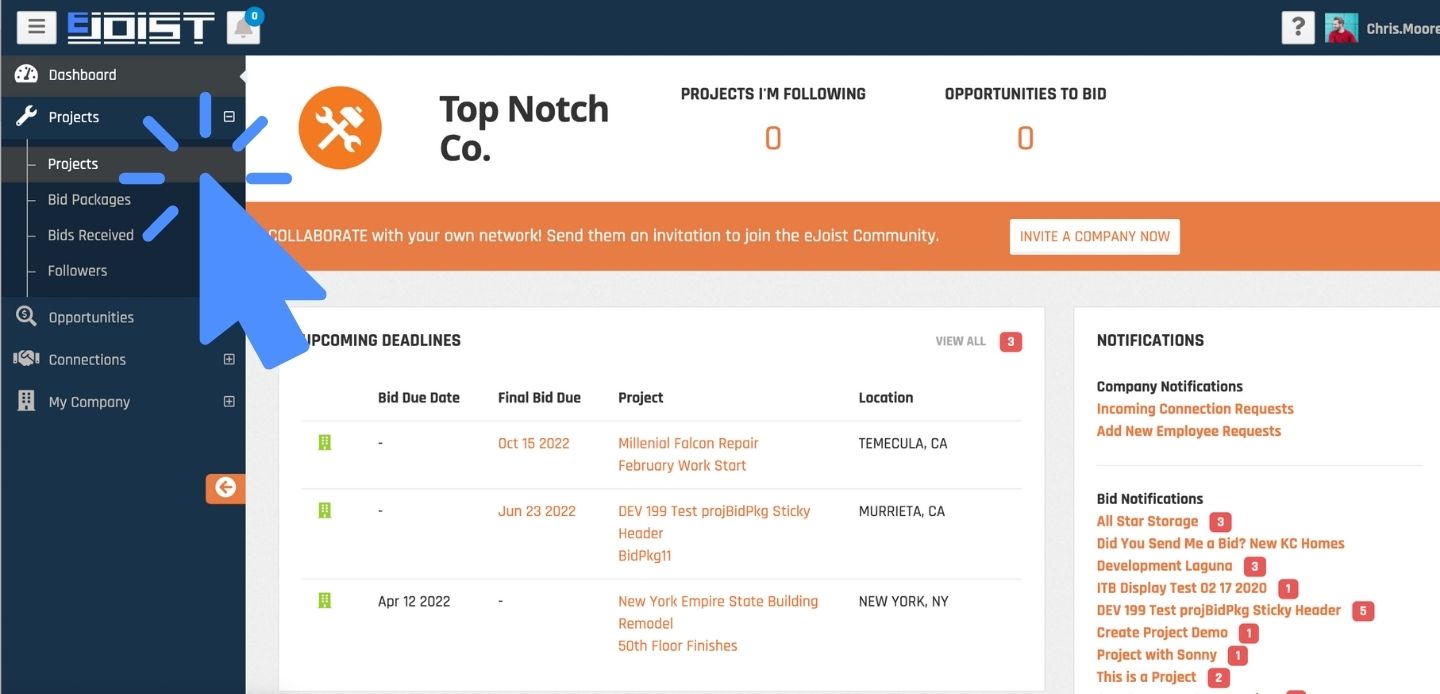
1. Navigate to your Projects page via the side menu.
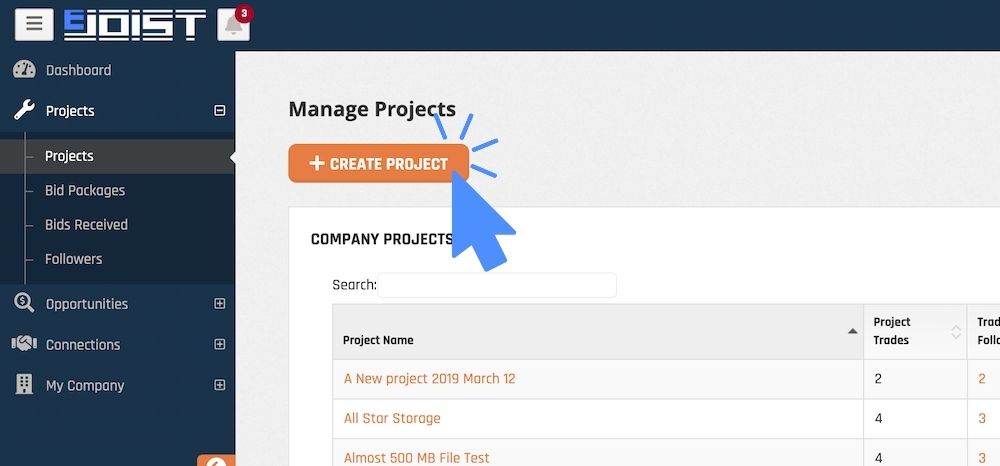
2. Once on the projects page, click on the orange button labeled “CREATE PROJECT.”
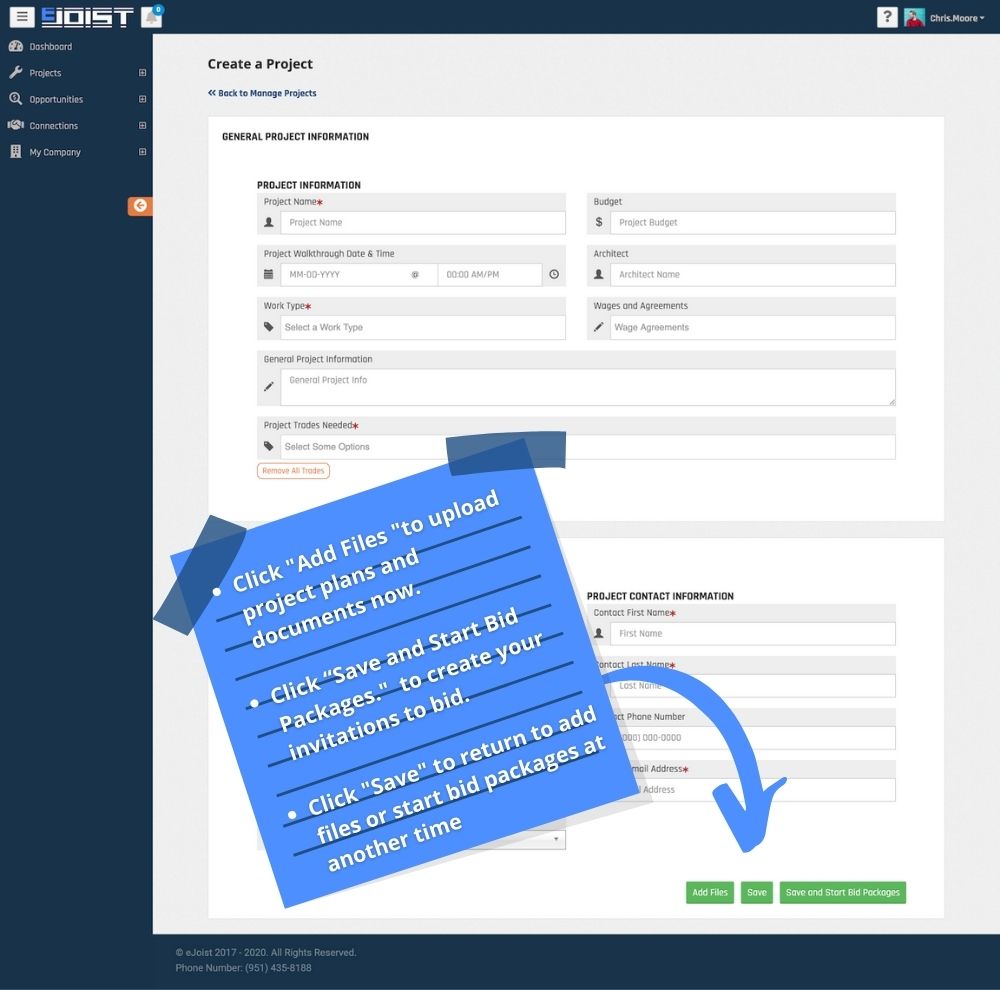
3. Enter project information into the form. Scroll down and select your next action once this page is complete.
- All project information here will be copied to every bid invitation. You will be able to add more details for each specific bid invitation later.
- Add all trades needed for the entire project. You will select the trades to invite in your bid packages from this list later. You can always add more trades later if needed.
ADDING FILES TO YOUR PROJECT
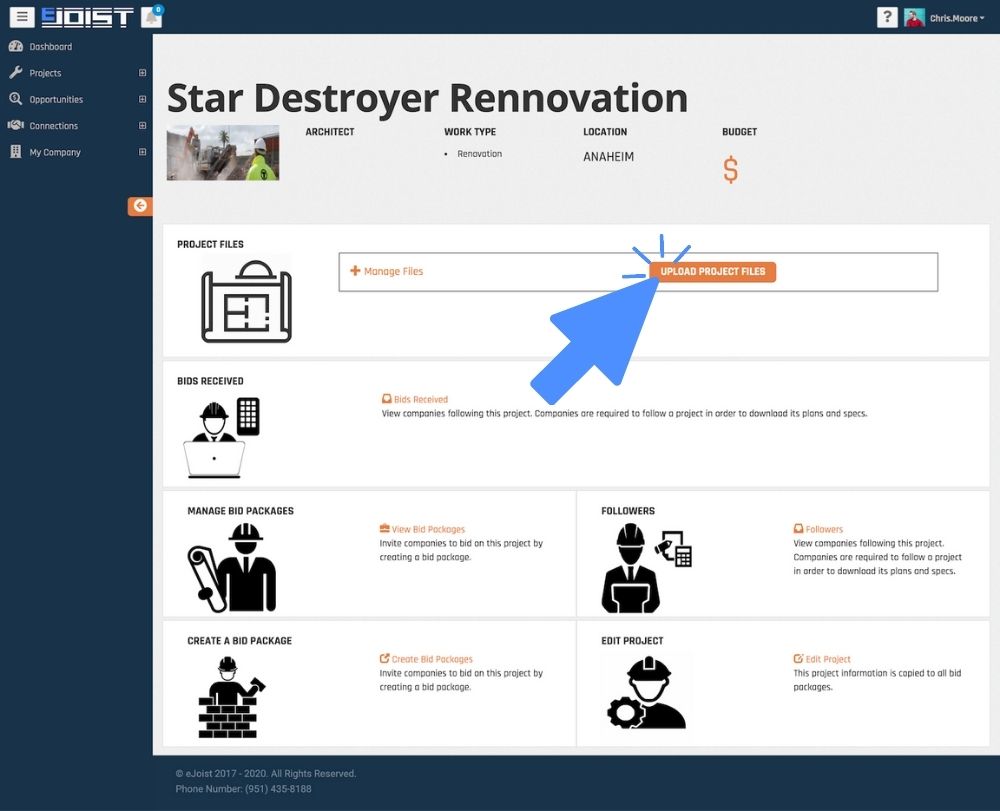
1. On your project dashboard, click the upload files button.
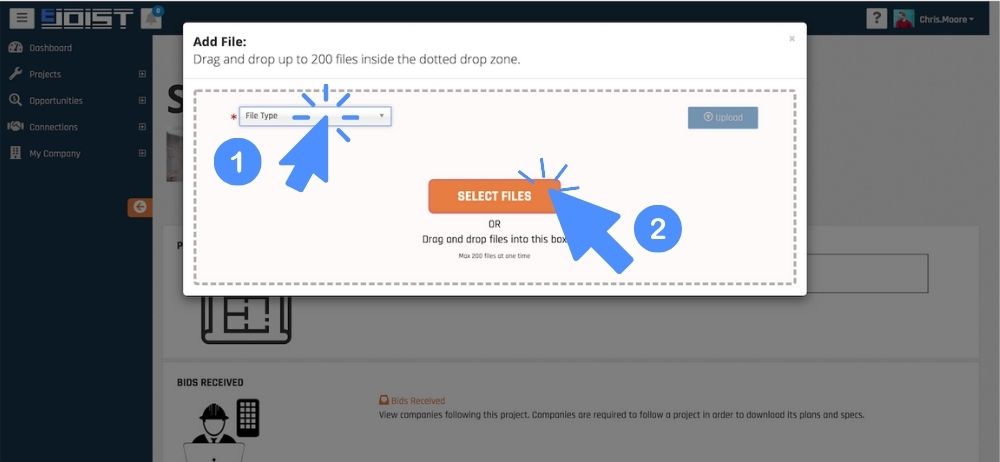
2. When the pop up box appears, select the type of files that you will upload. Then, click the upload files button to choose the files you’d like to upload. Only upload files of the type of selected.
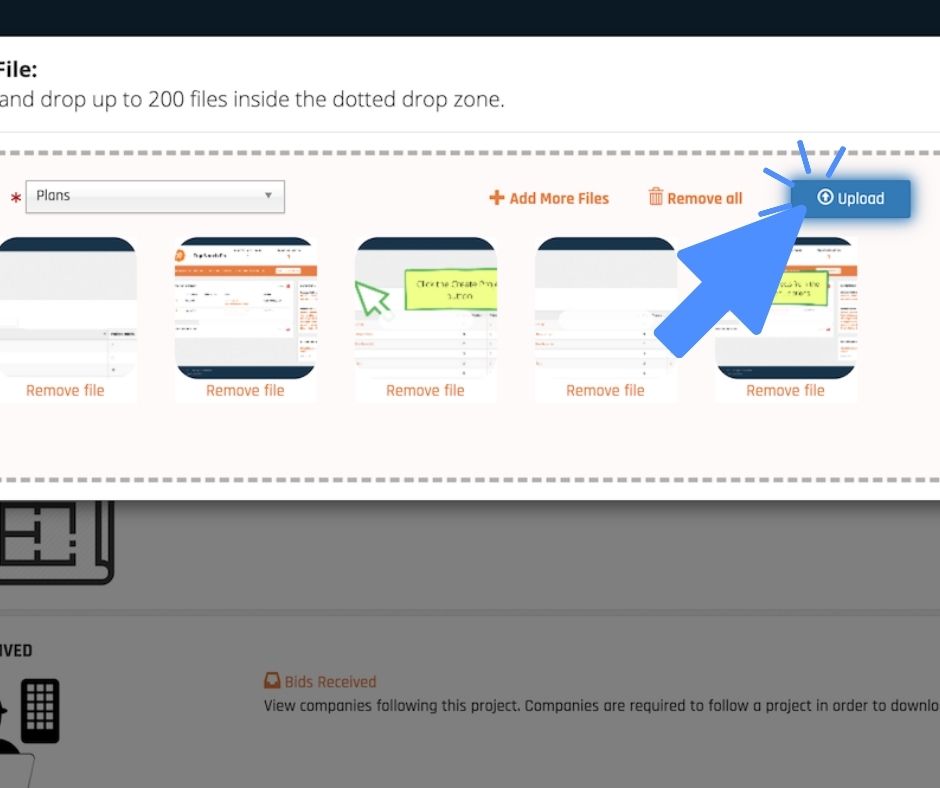
3. Once all files have been added, click the upload button in the right hand corner. Wait to be notified that all files have been uploaded before closing the box. Repeat this process for any other file types until all files have been uploaded.

That’s it! All project information, including files, will be copied to all bid packages that you create.
